Thursday, 26 May 2011


Rear Window 1954

It’s Hitchcock, what more can be said, still one of the greatest thriller directors and one of the main re-inventors of horror in the industry. The film is about an injured photographer who is wheelchair bound until he has recovered his injuries. Soon he becomes very interested in watching his neighbours and becomes convinced that he witnessed a murder. Very strong Hitchcock narrative.

What is great about this film, like many of Hitchcock films, is that he is flattering towards the audience who pay close attention and watch the film a few times. With every watch you’ll spot a new clue which seemed hidden before. These moments are the ones which get the audience very involved into the thriller because they feel like they are apart the mystery. I wouldn’t say that the film is a psychological horror but it is most defiantly psychological. It always keeps the audience guessing and thinking which a true thriller should.

Following in the similar footsteps as the other films which we watched, it’s a film about those who are closest to us, using both meaning s of the word the family and distance sense. It is a film about watching out and helping one another through day to day life. In a way that’s where the ‘horror’ of this film lies in the continuing distancing that humans have between one another.

When looking into psychological horror it is hard and almost impossible to say what scares each one of us because we all have our own fears. For example for me I guess the reason that silent moment in ‘The Haunting’ still scares me is because I listen to loud, aggressive music . So when that silence appears it frightens me because it is not what I want or expect. I think to make psychological horror successful you can only do and force feed the audience so much, until you audience need to start thinking for and about themselves. ‘In a blank room take away a man’s clothes, hair, style, identity and possessions, and they will be terrified of what they truly see.’ (The Suffering, P.54)


The Haunting 1963

Personally, I am a huge fan of classic horror from the beginning of the 1930’s through to the mid 60’s, this film is one of my all-time favourites. Being one of the last true black and white classic horror, what better film to end with than ‘The Haunting’. The story so such a classic old horror tale of a doctor and friends going to Hill House for prove there are such things as ghosts.

The film truly uses the most to the forgotten art of black and white film by having very gorgeous thick visuals. Great depths and stark jet black shadows creates fantastic atmosphere for a haunted house tale. It is filmed so well that as an audience member you are always looking around the corners and into shadows just to make sure everything is ok and settle your nerves. This is what the horror is here and one of the most common and oldest fears, alone with ghosts!

One of the final scenes just sums up the films great direction for me. When Eleanor is making her way up the old crooked spiral stairs. She’s hearing voices once again and now she has to know if there truly is a ghost up in the attic. Making her way up the stairs followed by a beautifully progressive score, the shadows become thicker and darker. The doctor is following behind but the stairs are unstable. She is moving faster and closer to the top and the wining becomes louder along with the score. Finally at the top the doctor grabs her and she comes out of her trace and falls into the doctors arms. As they make their way down the stairs the ghost of Mrs Marquay doesn’t shout or scream but just filters through the darkness and just stares.

This moment as a child petrified me. I found the silence of her movement so haunting. The witnessing of a ghost in this film is done with true perfection.


The Tenant 1976

If there is a director who has created arguably the greatest psychological horrors ever made within the film industry it would be Roman Polanski. With such as ‘Rosmary’s Baby’ under his belt he is instantly one of the best at tension, suspense, dark and surreal horror films.

Polanski himself plays Telkovsky in this film, a young man looking for an apartment in France. When he finally finds one, he discovers that it is empty because the previous tenant, Simone Choule, attempted to kill herself by falling out of the window. Simone dies from the fall and Trelkovsky begins to become obsessed with her, until to the point of believing that her death was caused by the rest of the tenants in the building.

What makes the films so successful (like many of Polanski’s film) is how nothing ever really happens, but it is through his excellent direction he creates the tension. With small changes always being made he achieves this. For example throughout the film the camera gets closer and closer to Tellovsky which pushes isolation into the characters and the audiences faces. Also the film holds a lot of tension from the very beginning by Polanski’s very wooden and tense performance. At first it looks like bad acting but when you realise all actors have this style you are able to tell it is another one of the director’s brilliant ways of created awkward high tension.

A film such as ‘The Tenant’ is not a horror films which is memorable for its gore or shock moments but the deep psychological effects it has on its audience which are fantastic. Much like ‘The Shining’ the films makes you very wary of those around you and to watch closer on them. This is done by a famous Polanski setting, an apartment building.

Polanski also writes the perfect script for this film. There are many haunting undertones which certain characters say such as ‘No, the neighbours are no trouble. I rarely see them’ - ‘good I prefer it that way.’ Little moments like this occur with every character which help to create this very strange connection between character and that they all have something to hide.


The Shining 1980

‘The Shining’ has become one of the all-time classic horror films. There are quotes and moments that no one can forget from that film and also techniques which so many horror directors used in today’s film within the genre.

Originally being a Stephen King book and the film is of the same name and follows the book very much how it was written and was directed by Stanley Kubrick. It’s the story of a man a woman and their son. The father is a writer and alcoholic and the son seems to hold physic powers involving the past and future. Together they go to an isolated hotel out in the snow for the winter to get away from everyday life in general.

The most famous scene, or one of, is ‘here’s Jonny’. This scene holds a lot of psychological horror for the audience to take in, especially for the era when it was released. At the time for constant slasher films, to have a very realistic horror was refreshing and also very effective. There are two ways in which the horror is at its strongest during this scene. Firstly the films score. ‘The Shining’ has a very dark underlying score which really helps to create the awkward and unnerving atmosphere which the films hold very tightly throughout. The deep cello’s constantly playing through and what makes the score new for a horror film is the lack of BAM, BAM, BAM which Hitchcock made so famous within the genre.

The second is the real time slow pace of which the scene happens. In most horrors the editing is fairly fast and keeps up the tension. With this scene the notorious bathroom moment when Jack is smashing down the door he was using a real axe. This gives the audience a strong sense of reality because with every smash on the door you can see wife’s face get filled with more and more fear as her fate get every step closer. This idea of your own family turning on you instead of an exaggerated 7foot killer, is what makes ‘The Shining’ so successful.

My Final Image.
My Final Image.
My Final Image.

My Final Image.
The overall project, for me, I think has gone very well. I am pleased with the final out come of the set and I think that the group on a whole worked very well. Out of all the projects which I have been apart of this past academic year, I feel that this one I have learned the most. Building and painting this set has been invaluable for me and I feel, especially with the wall techniques, I will used them in the future a lot.
I think the main problem we had as a group was at the start when trying to get ideas together. Although we had a lot of ideas, when we would decide on one it would soon be changed for something new. In the end I felt that the final idea which we had was the first we had. I think I learned that there is not time to get everyones ideas into the work and the best should be taken and get straight to work.
Luckily as a group there were no real arguments between team mates and everyone seemed to happily help one another.
Once the ceiling was on, it had to be painted. It had already been painted but didn't have the best effect only a base coat. It would have been easier to paint when it was still down but the group started panicking about time.
So I laid down paper all over the floor and stood for a long time flicking paint onto the ceiling to build texture to it. I used the same colours as I did for the walls.
The final bedroom walls I am pleased with and they came out how I had imagined them. My only gripe with them is with that they don't look wet enough in my opinion. Although trying a lot of different ways to make them look wet and slimy, even the most successful method I used still didn't come be successful enough.
For the future I am going to look into what is actually the best method to use.

The final stage of the bedroom walls was to give them the extra slimy wet look which I wanted. I found the best method to do this was to drip vanish all over the walls and then brush a thick layer onto the main mold sections. When it had lights shone onto it, it reflected back to give to that extra shine instead of being completely flat in look.

Although we kept adding more and more layers onto the walls. Once I felt it was enough I decided that I wanted more of the mold effect. I tried a few different ways of creating the mold/slime on the walls. PVA glue being splattered, PVA with flour and more, but the most effective was elephant roll. I torn lots of little strips of the roll painted them and then dipped them in PVA glue. By constantly piling strips on top of each other it created a great dripping slimy mold effect. I decided not to do it all over the walls in every hole because I thought it would loose its effectiveness.
I like this image because it emphasises our idea of how we wanted to have a huge contrast between the two room.


This process was about constant layering, smudging and flickering, and the more we did the better the effect became.


Paints used...


Paints used...
Now that the walls were completely torn, it was time to paint. The painting process here didn't hold much technique to follow, but became a movement which we chose. the very base color of the paper was a off green but I wanted the walls to hold a lot of texture, layers and layers. This meant I got sponges which held a mixture of colours then squeezed then and the top of the walls. Flicked brushes, through paint and sponges. In all this was always building aged layers.
I painted around each of the tears in the paper in a dark shade of brown. it held to bring the tears alive and also helped to add the effect that they had torn open naturally through growth.
Finished torn paper.


Beginning of tearing down wallpaper.
Now that the walls were completely painted it was time to do the second layer which I had planned, wall paper. I had chosen the bedroom wallpaper carefully and for two reasons. Firstly the base colour was white, this meant I wound be able to paint easily onto the paper. Also the florals on the paper were green which is one of the main colours which I wanted fairly prominent in the room.
To wallpaper I followed the exact same process as in the living room.
Once the paper was up and dry I started to pull down pieces of the wallpaper. At first I was choosing where I want to tear down paper but in the end I want it to be very messy and violent so I torn all over. To exaggerate the tears I got an iron brush and a pair of scissors and torn and brushed over and over again until I felt it was enough.


This is what the base layer looked like.


I was given a group of three extras to help me with the process of painting the walls. Before I could take them on, I spent around 30 mins practicing different techniques and way for me to achieve my goal.
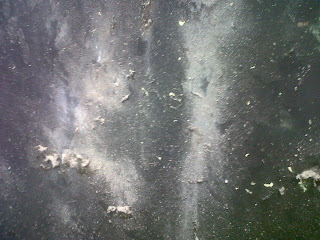
For the base coat I firstly laid down two different colours, black and a dark brown in a dabbing motion. this created a nice blend of colours instead of one flat colour all the way around. I then flicked a yellow and also green colour over the top. Then finally, I through fine saw dust from the hoover and bins at the walls. Doing this gave the walls the thick mold effect I wanted. I found that the best way to make the wall look effective was by constantly adding layers on top of each other. It kept building age and filth to the walls. Once I had decided the best way to paint the walls I showed the others and then they all were able to help.
BEDROOM:

When I came to paint the bedroom I had an exact plan of what I wanted to achieve and how I would achieve this end result. I soon realised that the best way to create the grim and dark nature of the walls which I wanted was by trying anything I could think of. It was a slightly strange way to approach the task but it soon became very exciting to suddenly find a process that really worked.

Wednesday, 25 May 2011

The final part to creating the walls for the bedroom was to create the infection around the double doors which lead into the bedroom. The double doors were not there when I painted the and around the frame.
I already knew that I was going to have the infection around the entrance to the bedroom. So I originally painted the base coat a few inches out around the frame using the same techniques as the bedroom walls, before I put up the wallpaper. Then I torn the wallpaper away from the wall to reveal the underneath painting. I then painted all the white tear marks which where left with the paint mixture which I used for the walls, but applied it much thicker. To finish the process I flicked paint onto the wall to create texture the wall. This help to create the idea of the 'infection' creeping through into the main house.
Paint / Water Mixture
Now that the wallpaper was up, it was time to age the paper and make it look more authentic. The family who live here we wanted to look house proud so I needed to only add a slight hint of ageing to the paper itself.
I did this by getting a tub of water and then adding any blobs of paint I could find, this included colours such as black, dark brown, yellow ocher and very dark green. After mixing this all together it created a great murky damp colour. At first I tried using a roller to apply then paint mixture and then use a dry roller to clear up any of the drips - I wanted to avoid drips at all cost because they would make the walls look obviously painted - This process worked but it didn't create a dark enough colour to set on the walls. The process I finally used was actually found by mistake. I would get a handful of elephant roll and then dunk it into the water/paint. Squeeze out the excess and then in a circle motion apply the mixture to the paper. I found that the drier the roll became the more successful the effect looked because each circle wouldn't be as noticeable.
I was pleased with the out come. I felt that when looking at each wall on the whole it gave an effective damp look.

LIVING ROOM:

My first task was to decorate the living room. This room I have designed so that it is much more subtle and real rather than like the in your face bedroom. I had three main tasks for the living room, firstly to wallpaper the room then to paint the damp effect onto them and finally to create the 'infection' around the double doors.

To put of the wallpaper I had the put a layer of paste on all of the flats to create a base layer. Otherwise the wallpaper would fall down because the MDF would absorb it. During the first layer dried we cut out the wallpaper down to the sizes which I needed. With the wallpaper I bought I only needed to put on another layer straight onto the wall and put the paper straight on. By pushing down and outwards it laid the paper flat down onto the wallpaper. It seemed like a fairly long winded process, but was done pretty fast
Now that the whole set was built, everyone went to build there own personal projects such as tables and chairs. Everyone helped one another and worked well as a team, but it was time for me to start my own project of decorating the walls.
With some headaches, the fire place is built.

Here you are able to see the living room walls about to meet up.


Now that all of the flats were built it was time to piece the large model together. To make them stand together headers and stands were made which would hold them together and upright. Then it is a process to follow each flat with the next flat all the way round until all the walls are up and together. Any of the areas where the windows were they were pieced together by having one screwed high and one lower. Then the next flat would start the original process again.

We didn’t really experience any big problems when making our flats. The main issues were that people didn’t mark off what was built so there were a few extras left. Also some on flats were not nailed together probably so there were either gaps between the flat and frame or there were a few stray nails pointing out. These nails were simply flattened to make sure the flats were safe to carry around the room.

Various sized flats.


The group ended up getting a good system going by turning into splinter groups. This meant

Group one/two were screwing together the frame.

Group three/four were nailing together the flats to the frames.

Finally I was routing the frames off. This was needed on about 75% of the flats just to get a nice clean finish to all of the flats. To do that safely I also needed to have someone with a hoover following me along to extract all of the dust and wood shaving which were being generated.


To attach the sheet I would firstly mark onto the sheet were the centre beams are so I know for later were to nail. So I firstly I draw around the whole frame with PVA glue, this will give the flat some extra hold all the way around instead of just the nailed parts. It takes two really to lay down the sheet accurately I line with the frame. If the sheet is slightly out or doesn’t quite fit then it can be routed later but I will come on to that later. Once everything is lined up we were ready the either pin or nail gun together the flat with the frame. To do this well you need to start at one end do all the way along, next along both sides and finally finish at the opposite end that you started at. This will ensure that the wood wont bow or go off centre.

Flats

Building the flat although seeming an extremely daunting task for us as a group, in turn it was much easier than expected (once we had the hang of it).

To build the flats we firstly got the measurements for every flat which needed and the amount, for example eight 8x4’s. We needed to do some math when working out the different lengths for each of the flats to make sure each wall would be the right size.

Once we had all our measurements sorted we made a tally on a board so that we could mark down what we had done plus what flats were left to do.

To build the flats we created the frame for a certain size , once again using 8x4, these are made by being screwed together with supporting beams through the middle to make sure they are are strong. Once we had screwed together the 8x4 frame it is time to add a flat sheet of MDF onto the frame.


Once the model was finished completely, we realised that we hadn’t enough room. We decided to and just an extra foot to each of the rooms, this allowed us to keep all the measurements which we had been working with for a while but just gave us that little extra room which we needed.

I quickly remade the walls and it instantly freed us up. It gave us a little more to work with plus to move around inside the set more. With the model finished it gave us as a group a chance to truly visualise the set and take practice photographs of what we could do for our final shots. We practiced the shots which we had originally thought of doing in discussions.